
A bio page is a customizable, measurable landing page where you bring together all your important links: social networks, website, bookings, offers, contact forms and much more. You create it in two steps.
Step 1: create the page
- In the left menu, click Bio Pages.
- Click the Create Bio button in the top right.
- Fill in the page Name (for example your name or your business name). It appears as the title of the page.
- Optionally, fill in the Alias – the part after the domain in the page address (for example
studioanaforselfpage.link/studioana). If you leave it empty, a random one is generated. - Click Create.
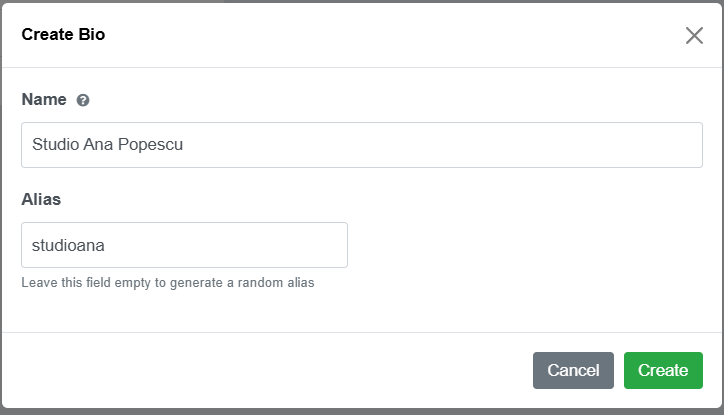
Step 2: fill in the page in the editor
Once the page is created, the page editor opens automatically. You edit the content on the left and see on the right, in real time, how the page looks on a phone.
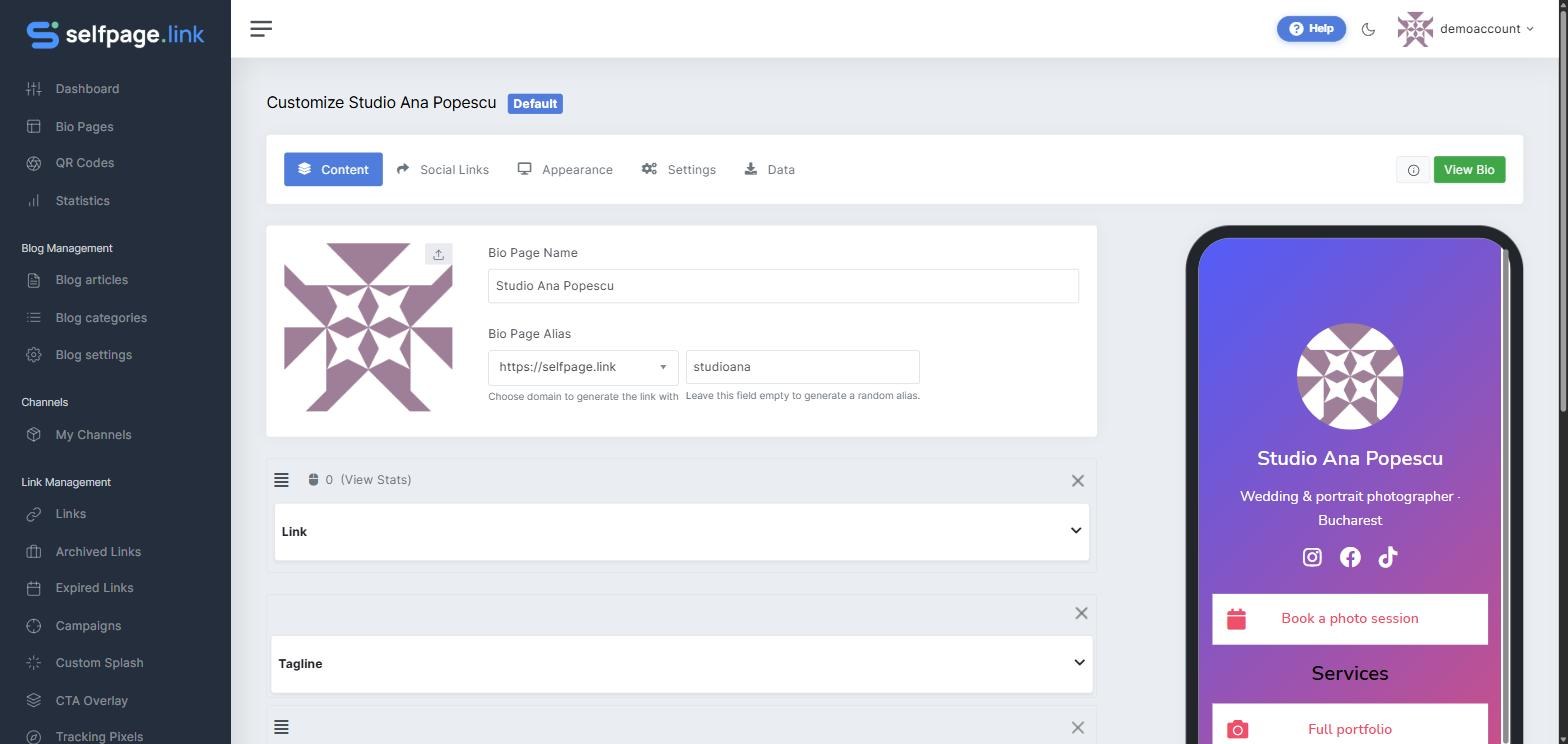
The editor has five tabs:
- Content – the photo (avatar), the name, the page address and the blocks: links, text, images, forms, videos and more. See How do I add links and other blocks?
- Social Links – the icons of your social networks. See How do I add social media icons?
- Appearance – the theme, fonts, colors, background and button style. See How do I change the look of the page?
- Settings – SEO, password, sensitive content, branding, pixels and CSS. See Advanced bio page settings
- Data – the emails and data collected through forms. See How do I collect emails and messages?
There is no "Save" button: every change is saved automatically. When the green Profile has been successfully updated. message appears, the change is already live.
View and share the page
Click View Bio (the green button in the top right) to open it in a new tab. The "i" button next to it shows the page link, a QR code you can download (PNG, PDF or SVG) and share buttons.
To make the page available at your profile address too, set it as default and turn on your public profile.
Plan limit: the number of bio pages depends on your plan and is shown to the right of the page list (for example 1 / 1).