
Categories group your articles by topic (for example "Tips for couples" or "News"). On the blog, visitors can filter articles by category. Every article must belong to a category, so it's a good idea to create your categories before your first article.
Create a category
- In the left menu, open Blog Management → Blog categories.
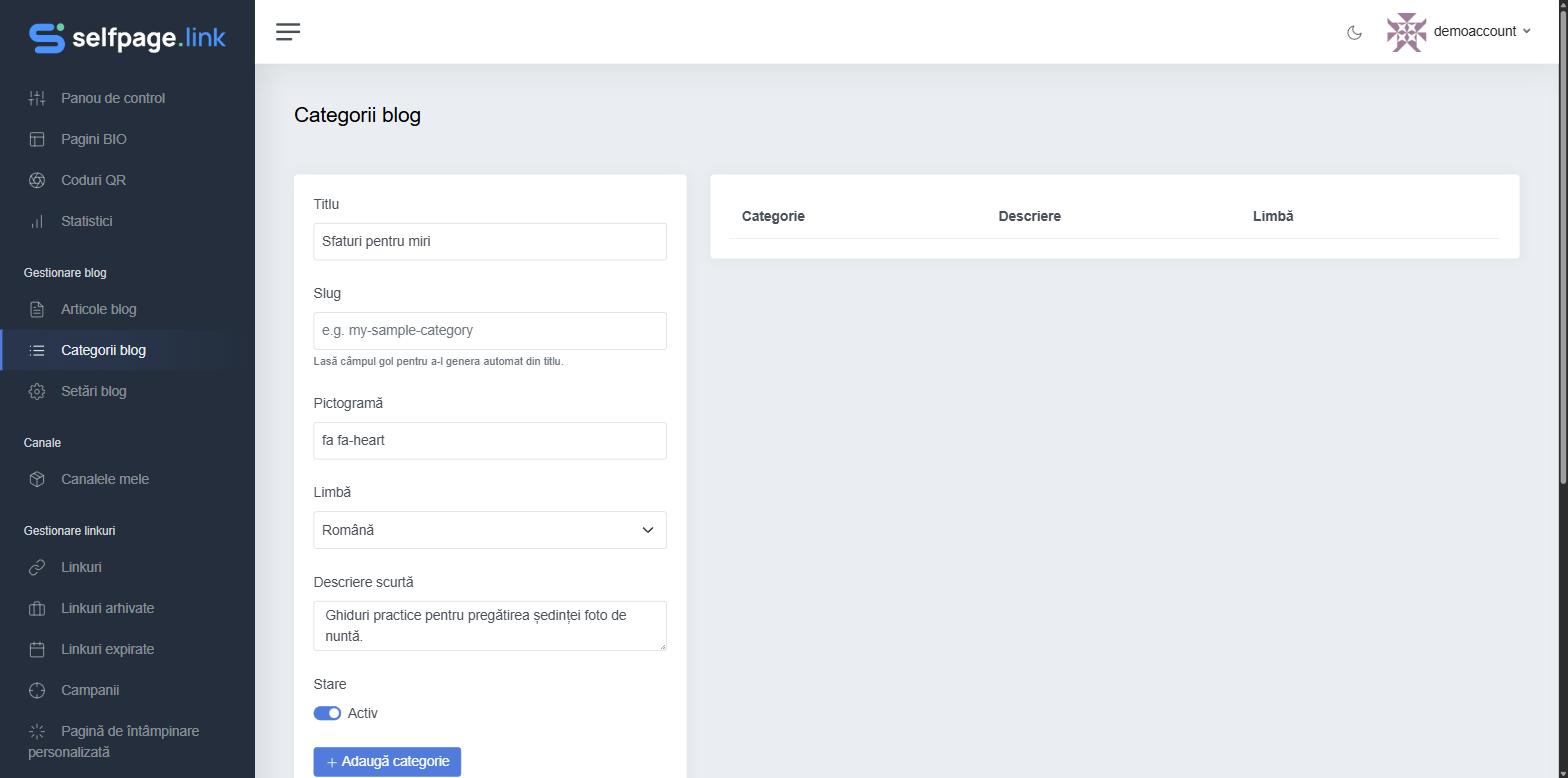
- Fill in the form on the left:
- Title – the category name, shown on the blog;
- Slug – the part of the address (for example
tips-for-couples). Leave it empty to generate it automatically from the title; - Icon – optional, a Font Awesome icon shown next to the name (for example
fa fa-heart); - Language – the language the category's articles are written in (for example English);
- Short Description – optional, a sentence about what readers will find in the category;
- Status – leave Active ticked so it's visible on the blog.
- Click Add Category. You'll see the message Category has been added.
Edit or delete a category
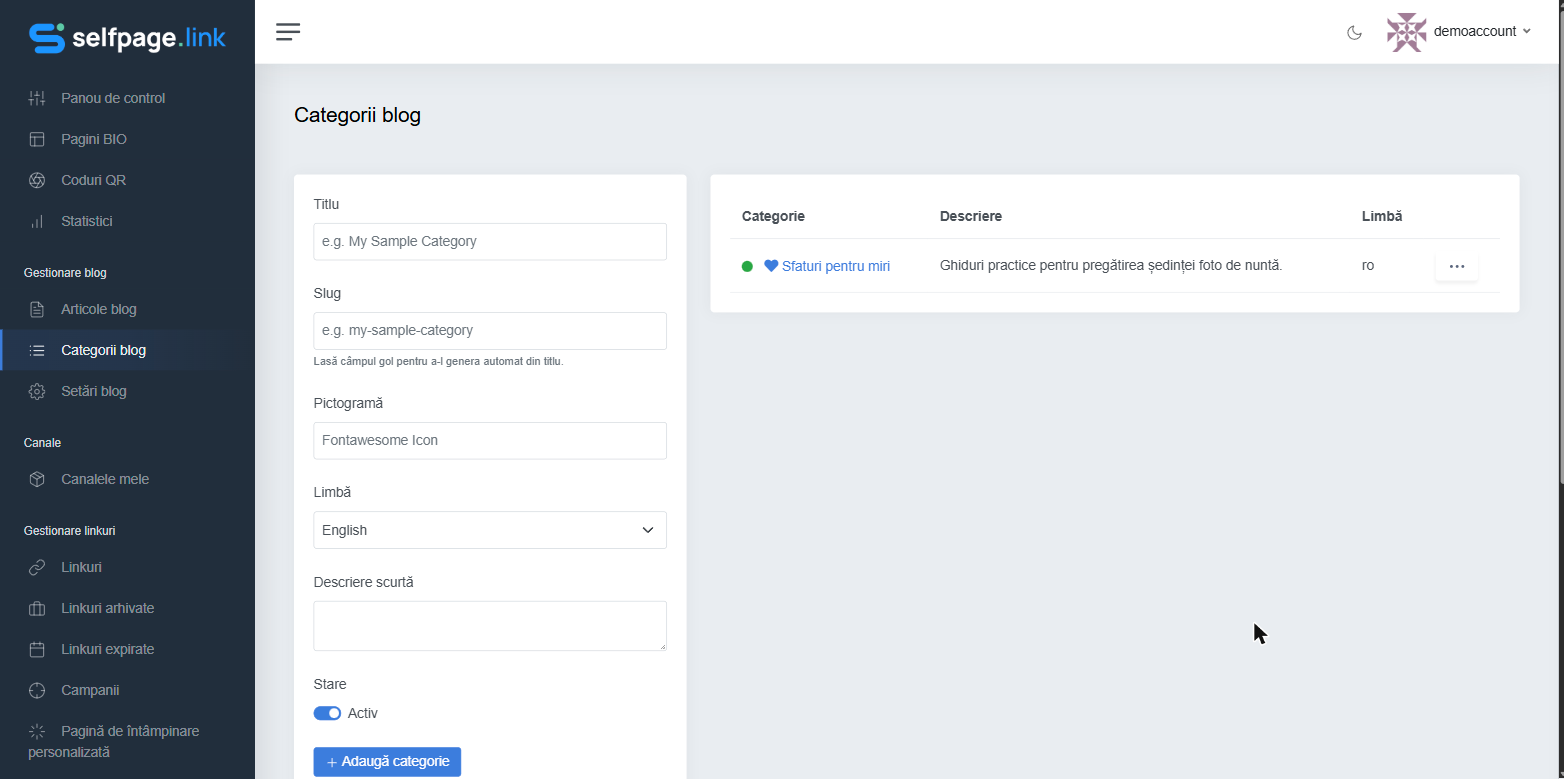
Your categories appear in the table on the right, with their icon, description and language. The green dot in front of the name shows they're active. Click ⋯ next to a category and choose Edit (change the title, slug, icon, language, description or status) or Delete.
Good to know: deactivating a category (unticking Active) hides it from the blog without deleting it. Before deleting a category, move its articles to another category.