
With Teams, your colleagues, collaborators or agency can work in your account without you sharing your password. You decide exactly what they can create, edit or delete.
Invite a member
- In the left menu, open Link Management → Teams.
- Click Add Member.
- Type the person's Email.
- Under Permissions, choose one or more permissions from the list.
- Click Invite.
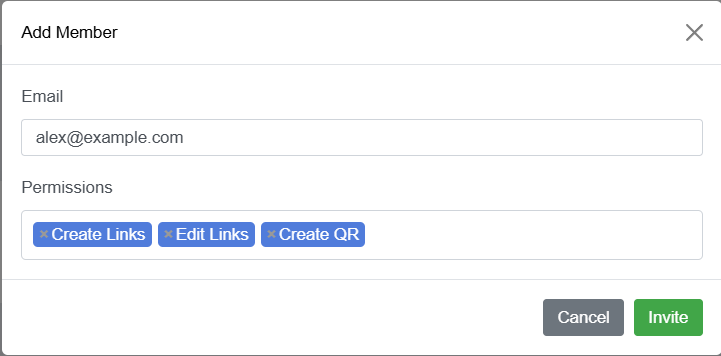
Available permissions
| Area | Permissions |
|---|---|
| Links | Create Links · Edit Links · Delete Links |
| QR Codes | Create QR · Edit QR · Delete QR |
| Bio Pages | Create Bio · Edit Bio · Delete Bio |
| Custom Splash | Create Splash · Edit Splash · Delete Splash |
| CTA Overlay | Create Overlay · Edit Overlay · Delete Overlay |
| Tracking Pixels | Create Pixels · Edit Pixels · Delete Pixels |
| Branded Domain | Add Custom Domain · Delete Custom Domain |
| Campaigns and channels | Create · Edit · Delete Campaigns/Channels |
| Data | Export Data |
Tip: give each person only the permissions they need. For example, a collaborator who only publishes links just needs "Create Links" and "Edit Links".
Manage members
In the Teams list, for each member you can:
- Edit – change their permissions;
- Disable / Enable – temporarily suspend their access;
- Remove – permanently revoke their access.
Until the person accepts the invitation, the member shows the Requested status.