
Tracking pixels let you run remarketing and measure conversions for people who click your links or visit your bio page – even when the link goes to a website you don't own.
1. Add the pixel to your account
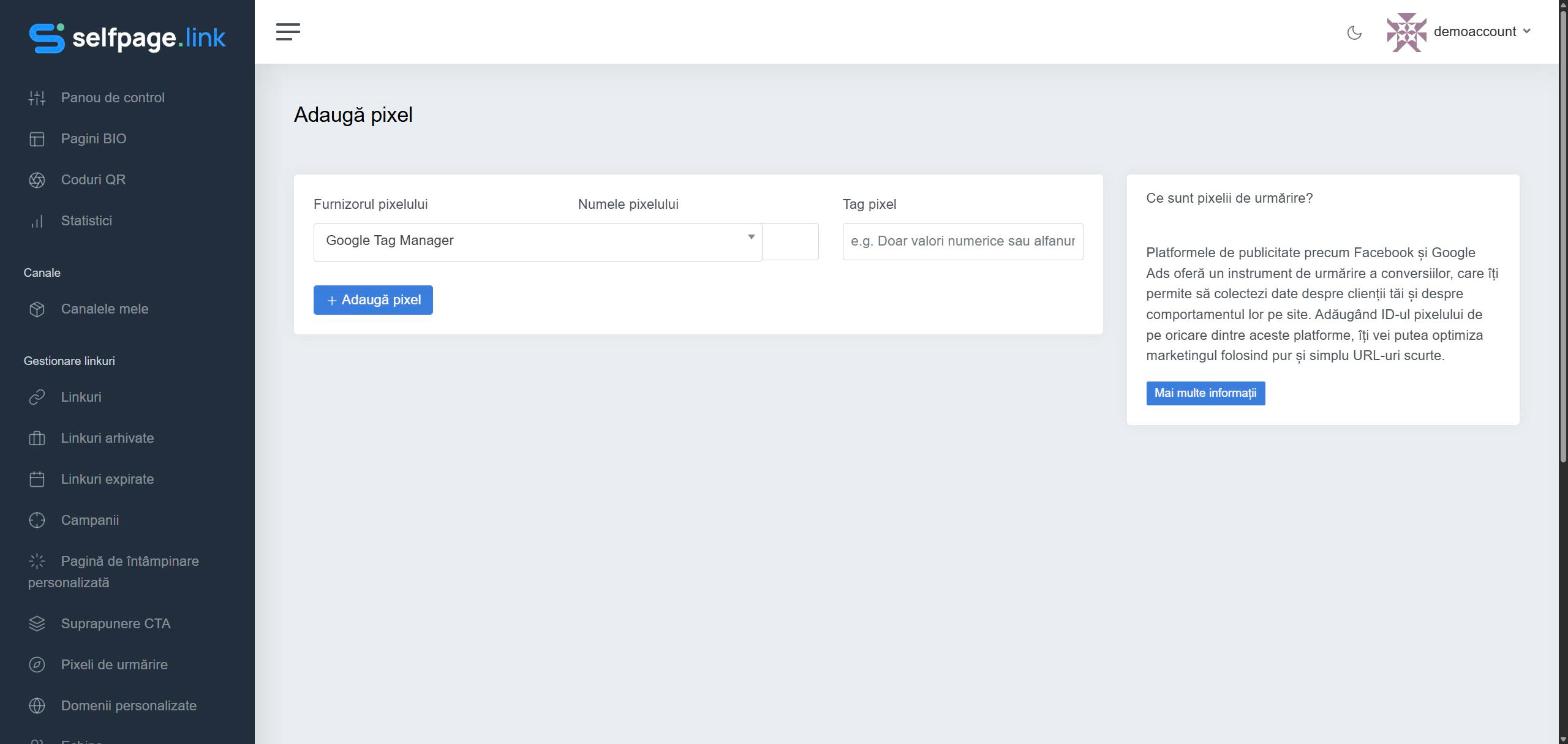
- In the left menu, open Link Management → Tracking Pixels and click Add Pixel.
- Choose the Pixel Provider: Google Tag Manager, Google Analytics, Facebook, Google Ads, LinkedIn, Twitter, AdRoll, Quora, Pinterest, Bing, Snapchat, Reddit or TikTok.
- Fill in the Pixel Name (just for you, for example "Facebook – shop").
- In Pixel Tag, paste the pixel ID from that platform's account.
- Click Add Pixel.
Example IDs
| Provider | What the ID looks like |
|---|---|
| Google Tag Manager | The container ID, for example GTM-ABC123DE |
| Google Analytics | The measurement ID, for example G-AB12CD34EF |
| Facebook (Meta) | Usually 15–16 digits, for example 1234567890123456 |
| Google Ads | AW- followed by digits, a slash and the conversion label, for example AW-12345678901/ABCDEFGHIJ |
The Insight Tag partner ID, for example 123456 | |
| AdRoll | The two IDs separated by a slash: adroll_adv_id/adroll_pix_id |
| Other platforms | The pixel or tag ID shown in the platform's ads manager |
Important: double-check the ID. A wrong ID doesn't show an error, but no events will be recorded.
2. Assign the pixel to your links or bio page
- New link: in the advanced options, Customize ⋯ → Pixels, then choose the pixels.
- Existing link: on the edit page, under Targeting Pixels.
- Several links: tick them in Links and click the Add Pixels icon.
- Bio page: in the editor, on the Settings → Targeting Pixels tab.
The pixels load on every visit, before the redirect, so the ad platform records the visitor.